Review sản phẩm
Xem Lịch Sử Thông Báo Trên Điện Thoại Android: Hướng Dẫn Chi Tiết!
Th5
## Xem Lịch Sử Thông Báo Trên Điện Thoại Android: Hướng Dẫn Chi Tiết!
Bạn muốn xem lại những thông báo đã nhận trên điện thoại Android của mình nhưng không biết làm sao? Đừng lo lắng! Bài viết này sẽ hướng dẫn bạn chi tiết cách kiểm tra lịch sử thông báo trên thiết bị Android của mình, dù điện thoại của bạn chạy phiên bản Android nào.
Lưu ý: Khả năng xem lịch sử thông báo tùy thuộc vào phiên bản Android và nhà sản xuất thiết bị. Một số điện thoại không có tính năng này hoặc có cách truy cập khác nhau.
Phương pháp 1: Sử dụng tính năng tích hợp (nếu có)
Nhiều điện thoại Android hiện đại đã tích hợp sẵn tính năng xem lịch sử thông báo. Bạn có thể thực hiện theo các bước sau:
1. Mở Trung tâm Thông báo: Vuốt xuống từ trên cùng màn hình (một hoặc hai lần tùy thuộc thiết bị).
2. Tìm biểu tượng “Lịch sử” hoặc tương tự: Biểu tượng này thường có dạng đồng hồ hoặc danh sách. Nếu không tìm thấy, hãy chuyển sang phương pháp khác.
3. Xem lịch sử thông báo: Nhấn vào biểu tượng để xem danh sách các thông báo đã nhận, sắp xếp theo thời gian. Bạn có thể cuộn lên xuống để xem chi tiết từng thông báo.
Phương pháp 2: Sử dụng ứng dụng của bên thứ ba
Nếu điện thoại của bạn không hỗ trợ xem lịch sử thông báo tích hợp, bạn có thể tải xuống và sử dụng các ứng dụng từ cửa hàng Google Play. Tuy nhiên, cần lưu ý rằng việc cấp quyền truy cập lịch sử thông báo cho ứng dụng của bên thứ ba có thể tiềm ẩn rủi ro về bảo mật. Hãy lựa chọn những ứng dụng uy tín và có đánh giá tốt.
Phương pháp 3: Kiểm tra từng ứng dụng (phương pháp thủ công)
Đây là cách cuối cùng nếu hai phương pháp trên không khả dụng. Bạn cần kiểm tra từng ứng dụng xem liệu ứng dụng đó có lưu lịch sử thông báo bên trong cài đặt của riêng nó hay không. Cách này khá mất thời gian nhưng vẫn có thể giúp bạn tìm lại một số thông báo quan trọng.
Mua ngay điện thoại Android chất lượng cao tại Queen Mobile!
Không tìm thấy lịch sử thông báo? Có thể điện thoại của bạn đã cũ hoặc không hỗ trợ tính năng này. Hãy nâng cấp lên một chiếc điện thoại Android mới tại Queen Mobile để trải nghiệm các tính năng hiện đại và tiện ích hơn! Chúng tôi cung cấp đa dạng các dòng điện thoại Android chất lượng cao từ các thương hiệu hàng đầu, cùng với chế độ bảo hành và hậu mãi tuyệt vời.
Queen Mobile – Chuyên cung cấp điện thoại Android, iPhone, máy tính bảng và các phụ kiện chính hãng.
[Link website Queen Mobile]#XemLịchSửThôngBáo #Android #HướngDẫn #ĐiệnThoạiAndroid #QueenMobile #MuaĐiệnThoại #CôngNghệ #TipAndTricks #Smartphone
Giới thiệu How to check your notification history on your Android phone
: How to check your notification history on your Android phone
Hãy viết lại bài viết dài kèm hashtag về việc đánh giá sản phẩm và mua ngay tại Queen Mobile bằng tiếng VIệt: How to check your notification history on your Android phone
Mua ngay sản phẩm tại Việt Nam:
QUEEN MOBILE chuyên cung cấp điện thoại Iphone, máy tính bảng Ipad, đồng hồ Smartwatch và các phụ kiện APPLE và các giải pháp điện tử và nhà thông minh. Queen Mobile rất hân hạnh được phục vụ quý khách….
_____________________________________________________
Mua #Điện_thoại #iphone #ipad #macbook #samsung #xiaomi #poco #oppo #snapdragon giá tốt, hãy ghé [𝑸𝑼𝑬𝑬𝑵 𝑴𝑶𝑩𝑰𝑳𝑬]
✿ 149 Hòa Bình, phường Hiệp Tân, quận Tân Phú, TP HCM
✿ 402B, Hai Bà Trưng, P Tân Định, Q 1, HCM
✿ 287 đường 3/2 P 10, Q 10, HCM
Hotline (miễn phí) 19003190
Thu cũ đổi mới
Rẻ hơn hoàn tiền
Góp 0%
Thời gian làm việc: 9h – 21h.
KẾT LUẬN
Hãy viết đoạn tóm tắt về nội dung bằng tiếng việt kích thích người mua: How to check your notification history on your Android phone
Phone notifications can be a nuisance. Perhaps you like to keep things tidy, or maybe you adhere to the Inbox Zero philosophy, but most of us like to keep our phone’s notification center clean and clutter-free. Although a sense of satisfaction accompanies swiping away a screen full of notifications, it’s possible to be overzealous and accidentally swipe away an important notice from eBay about an impending auction that you don’t want to miss. However, with a few taps (if you’ve turned on notification history), you can recover your lost notification. Here’s how to do it on a stock Android and One UI running on one of the top Samsung Galaxy phones.
Activate and check your Android notification history
Some smartphone makers deactivate notification history by default. If Android notifications are turned off on your phone, you can easily activate it:
- Swipe up from your homescreen to open the app drawer menu.
- Tap the cog wheel icon to open your Settings.
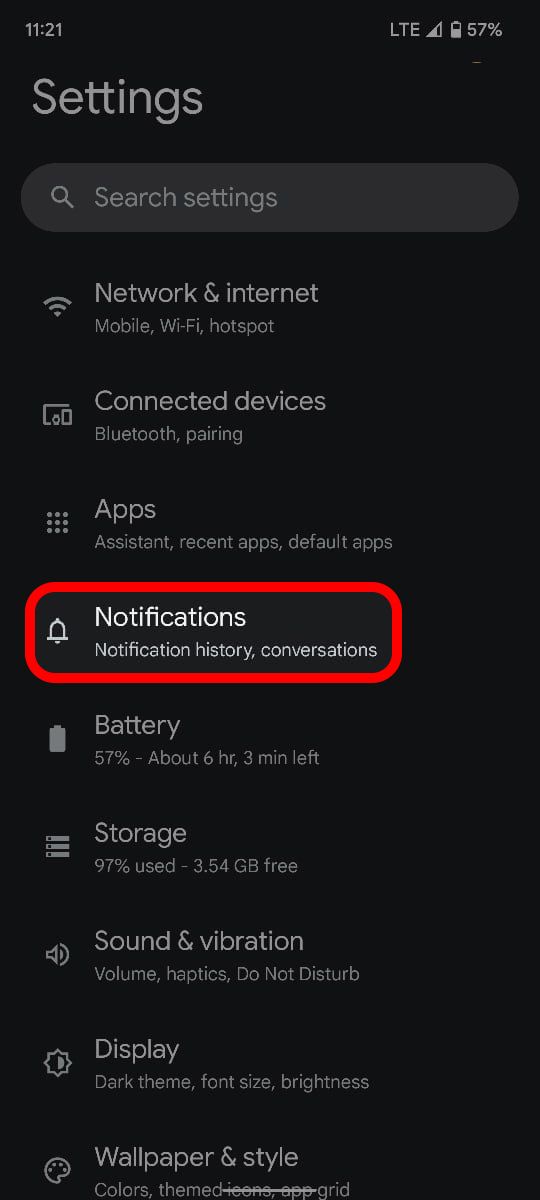
- Open Notifications.
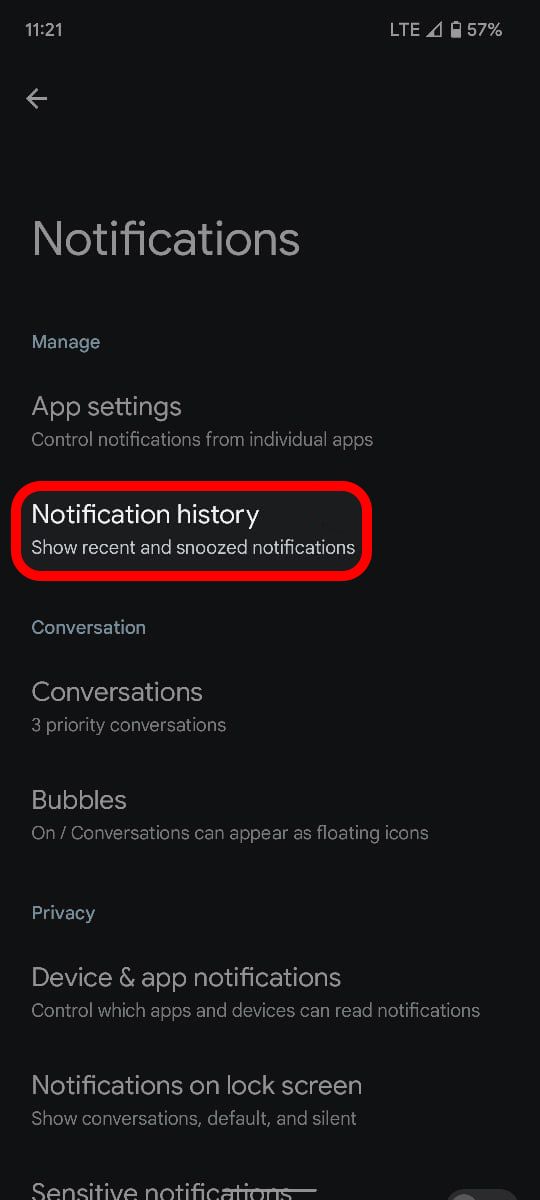
- Select Notification history.
- From here, you can look through your dismissed notifications. Turn on the Use notification history toggle from the Notification history menu if you haven’t already.
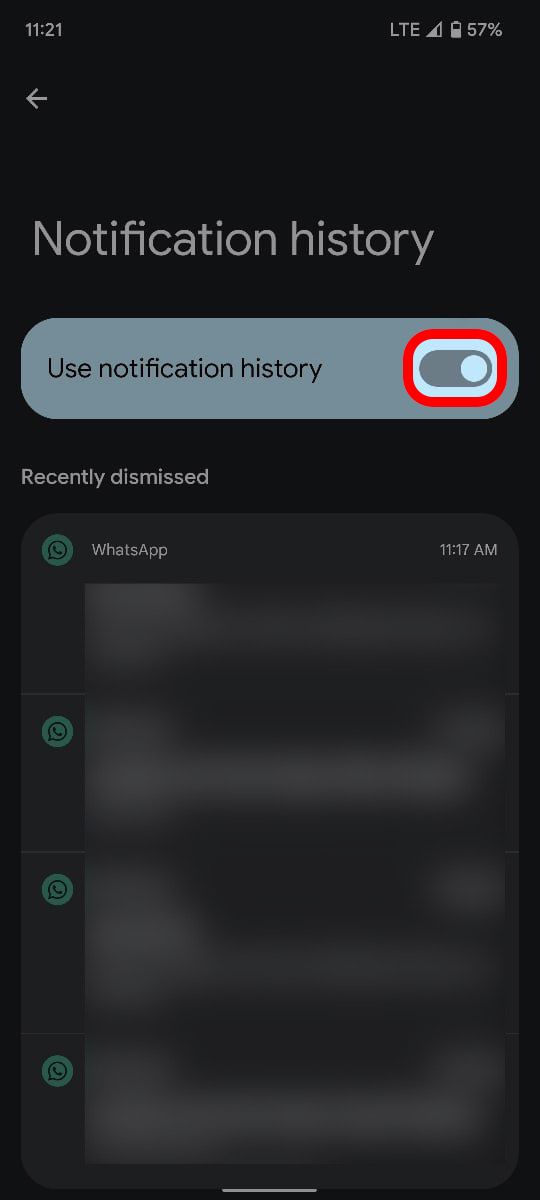
You can now dismiss any of your notifications and have your notifications history to fall back on at any time.
Activate and check notification history on Samsung Galaxy phones
Samsung uses a different Android skin called One UI. Because of this, the steps to activate and check your notification history differ slightly on Samsung phones.
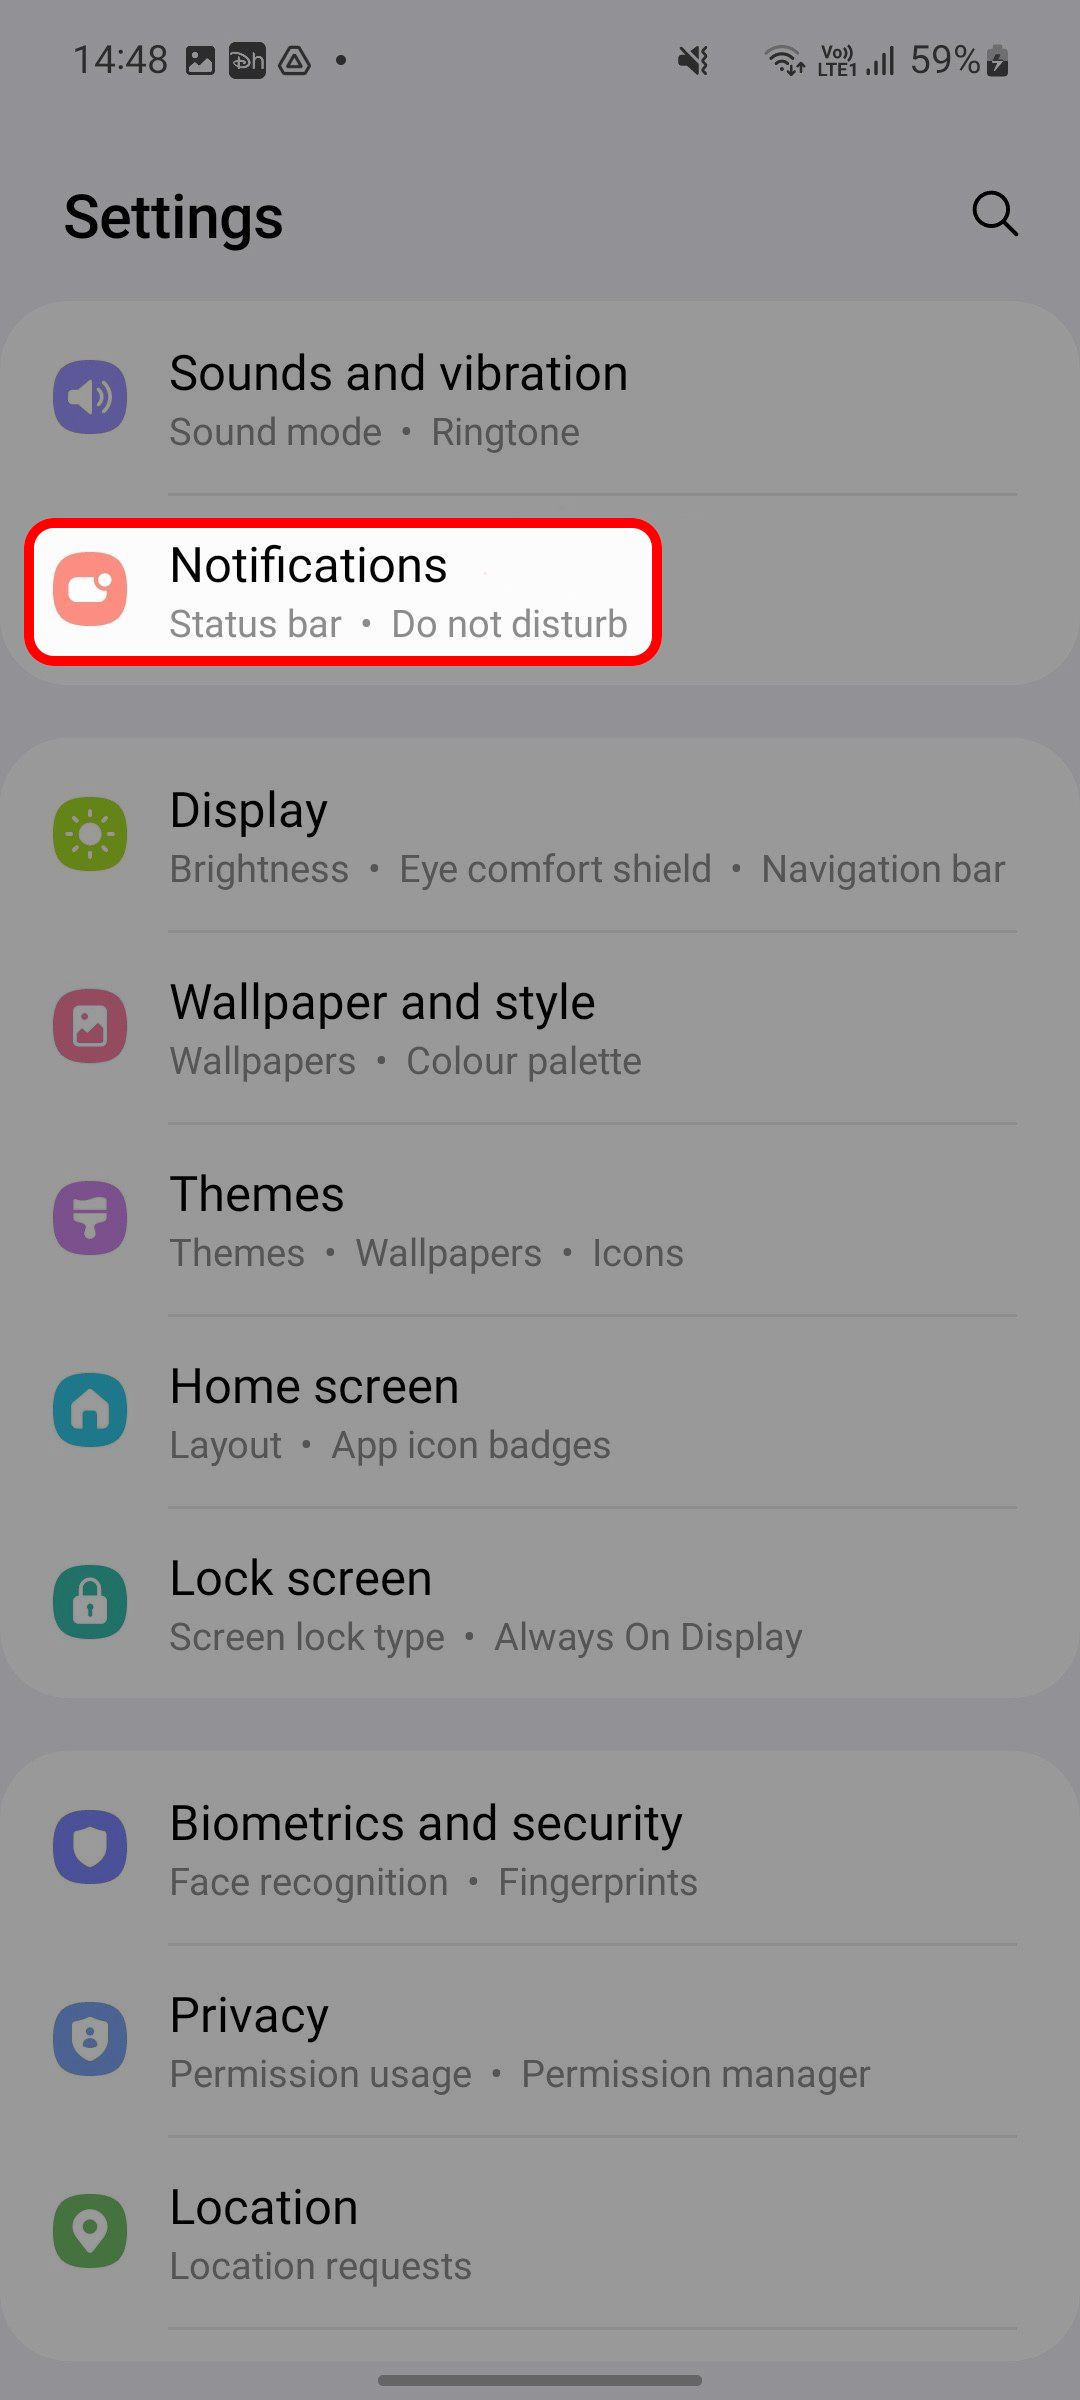
- Swipe up from the homescreen and open Settings.
- Scroll to Notifications.
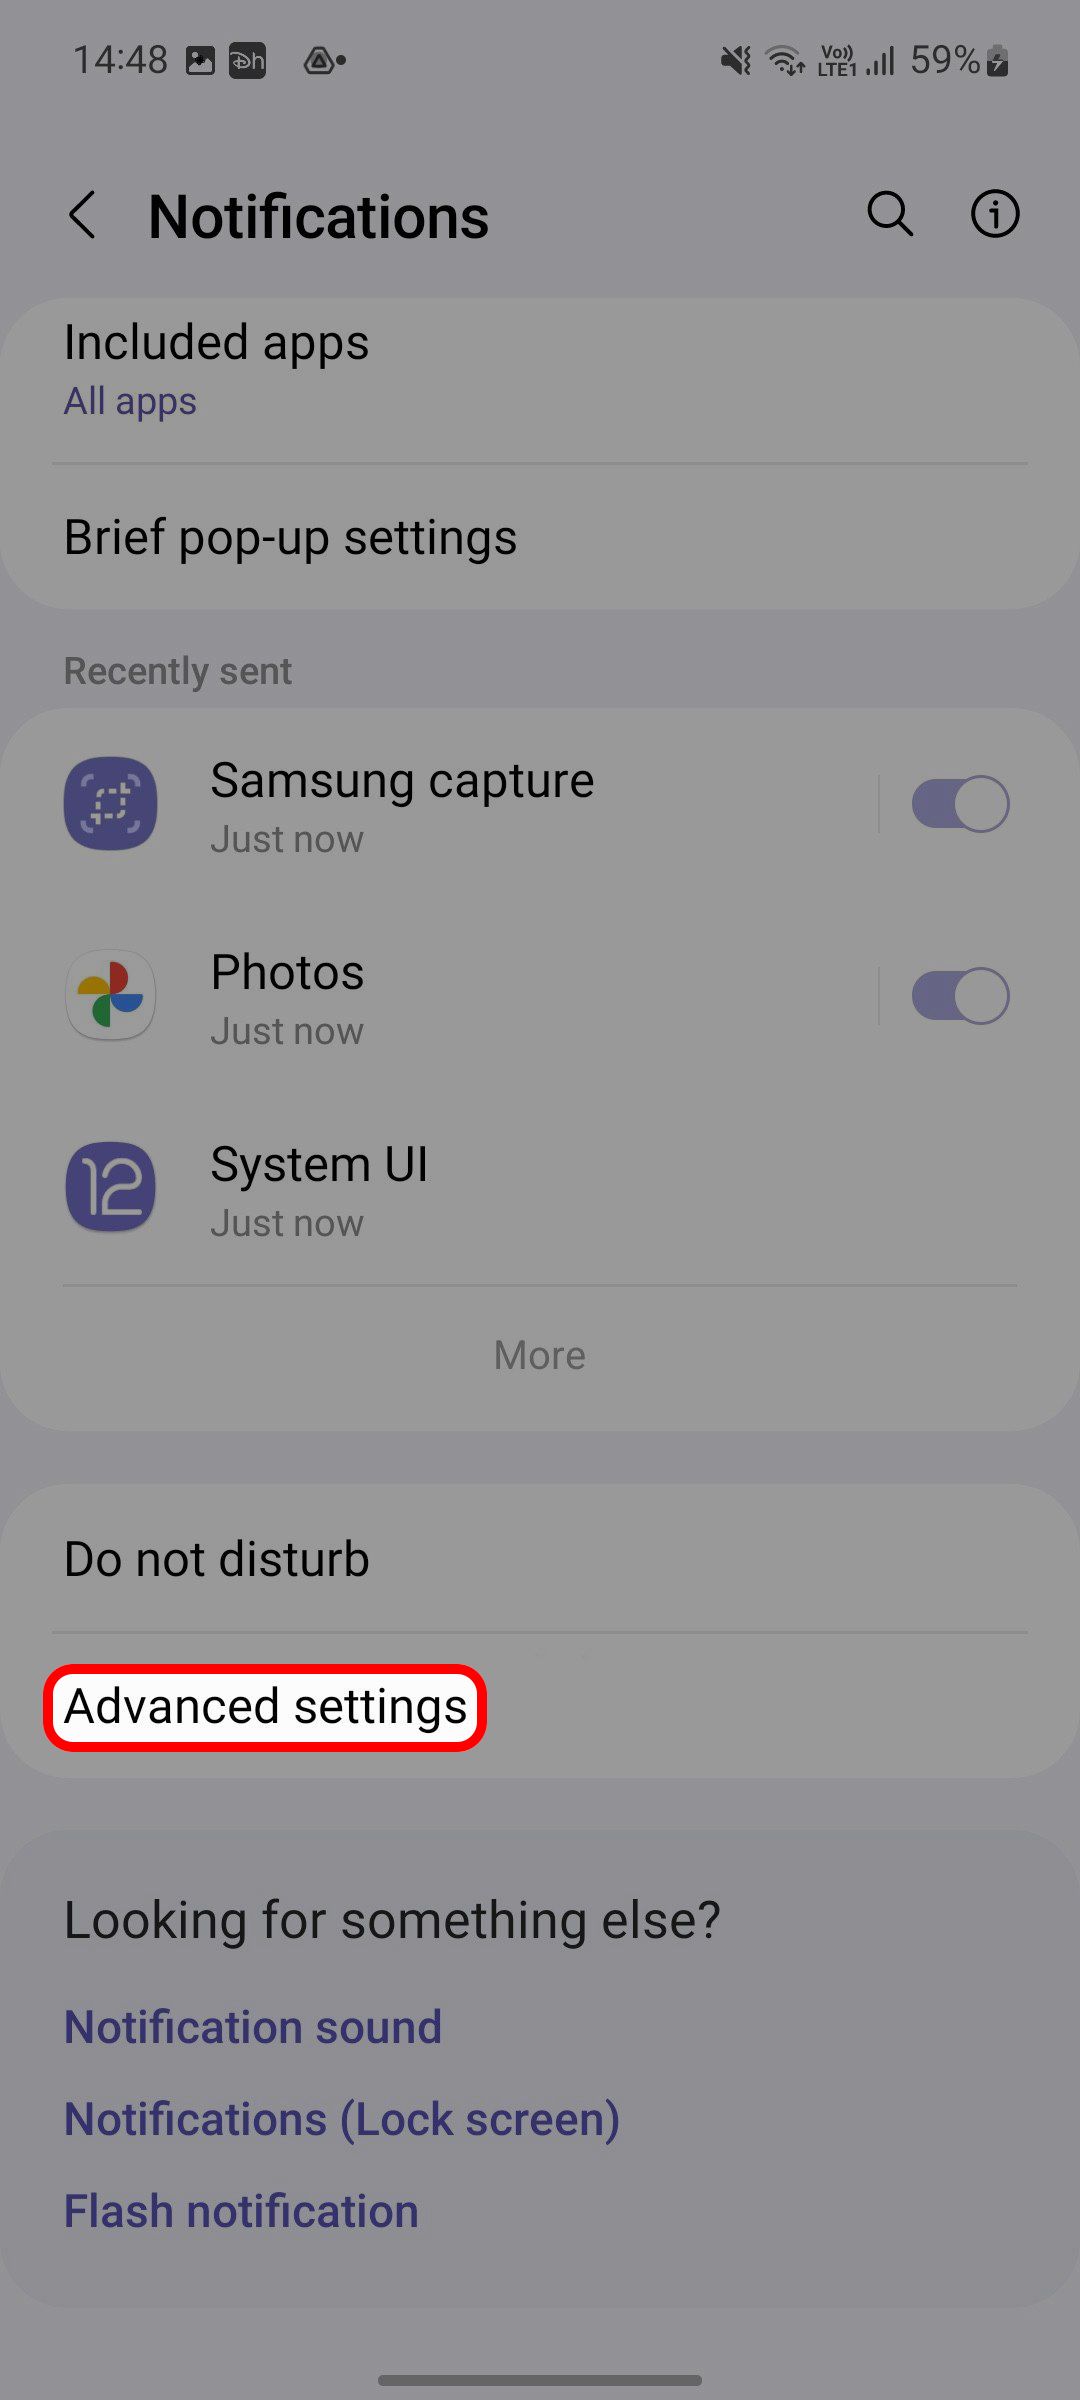
- Open Advanced settings from the Notifications menu.
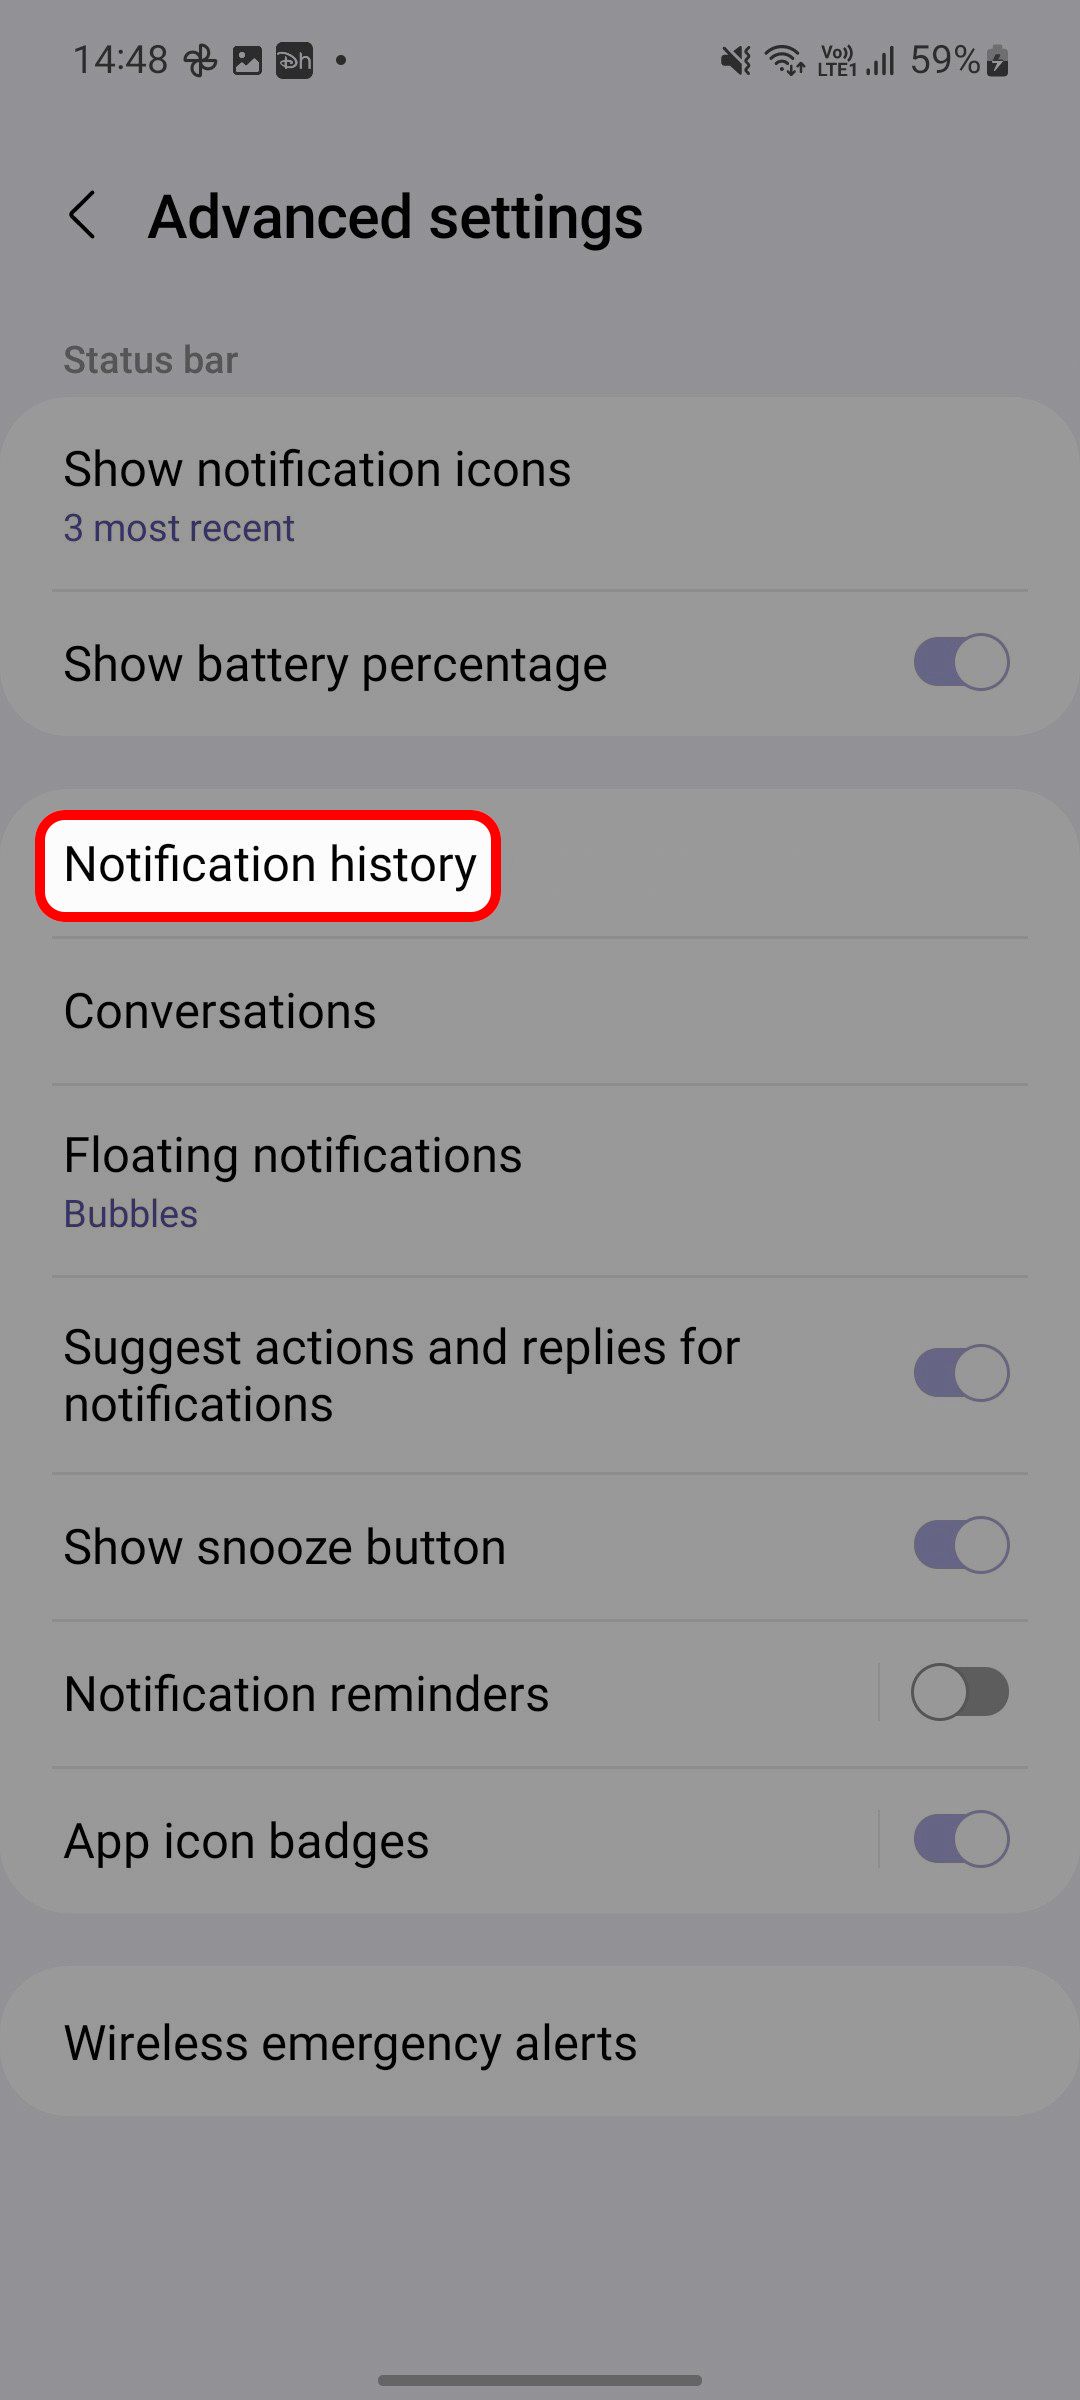
- Select Notification history.
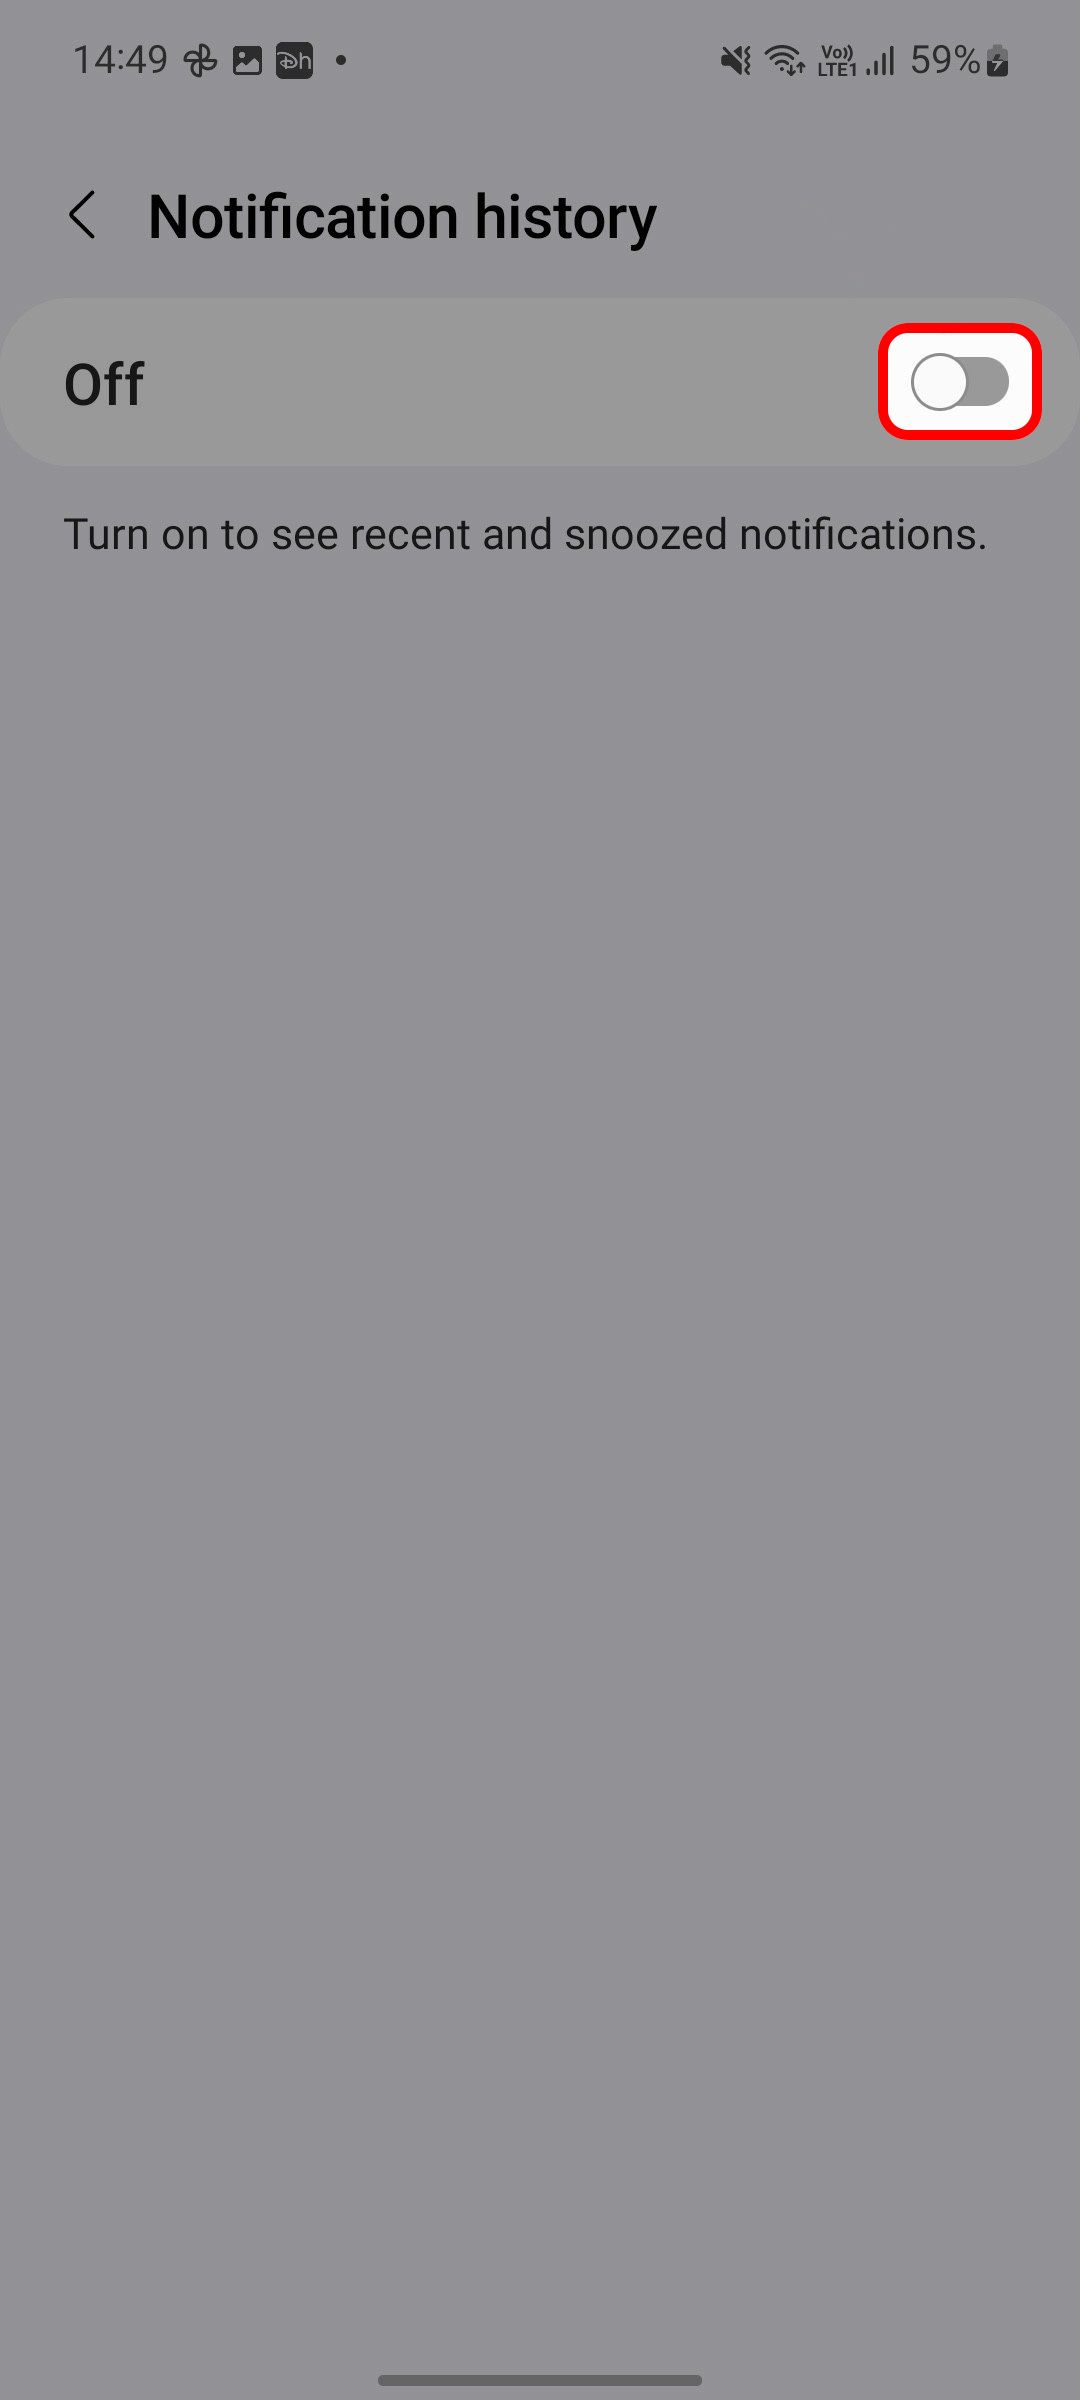
- Turn on the Notification history toggle.
- Swipe down from the top to open the notification center. Dismiss any app alerts and check the same from the Notification history menu.
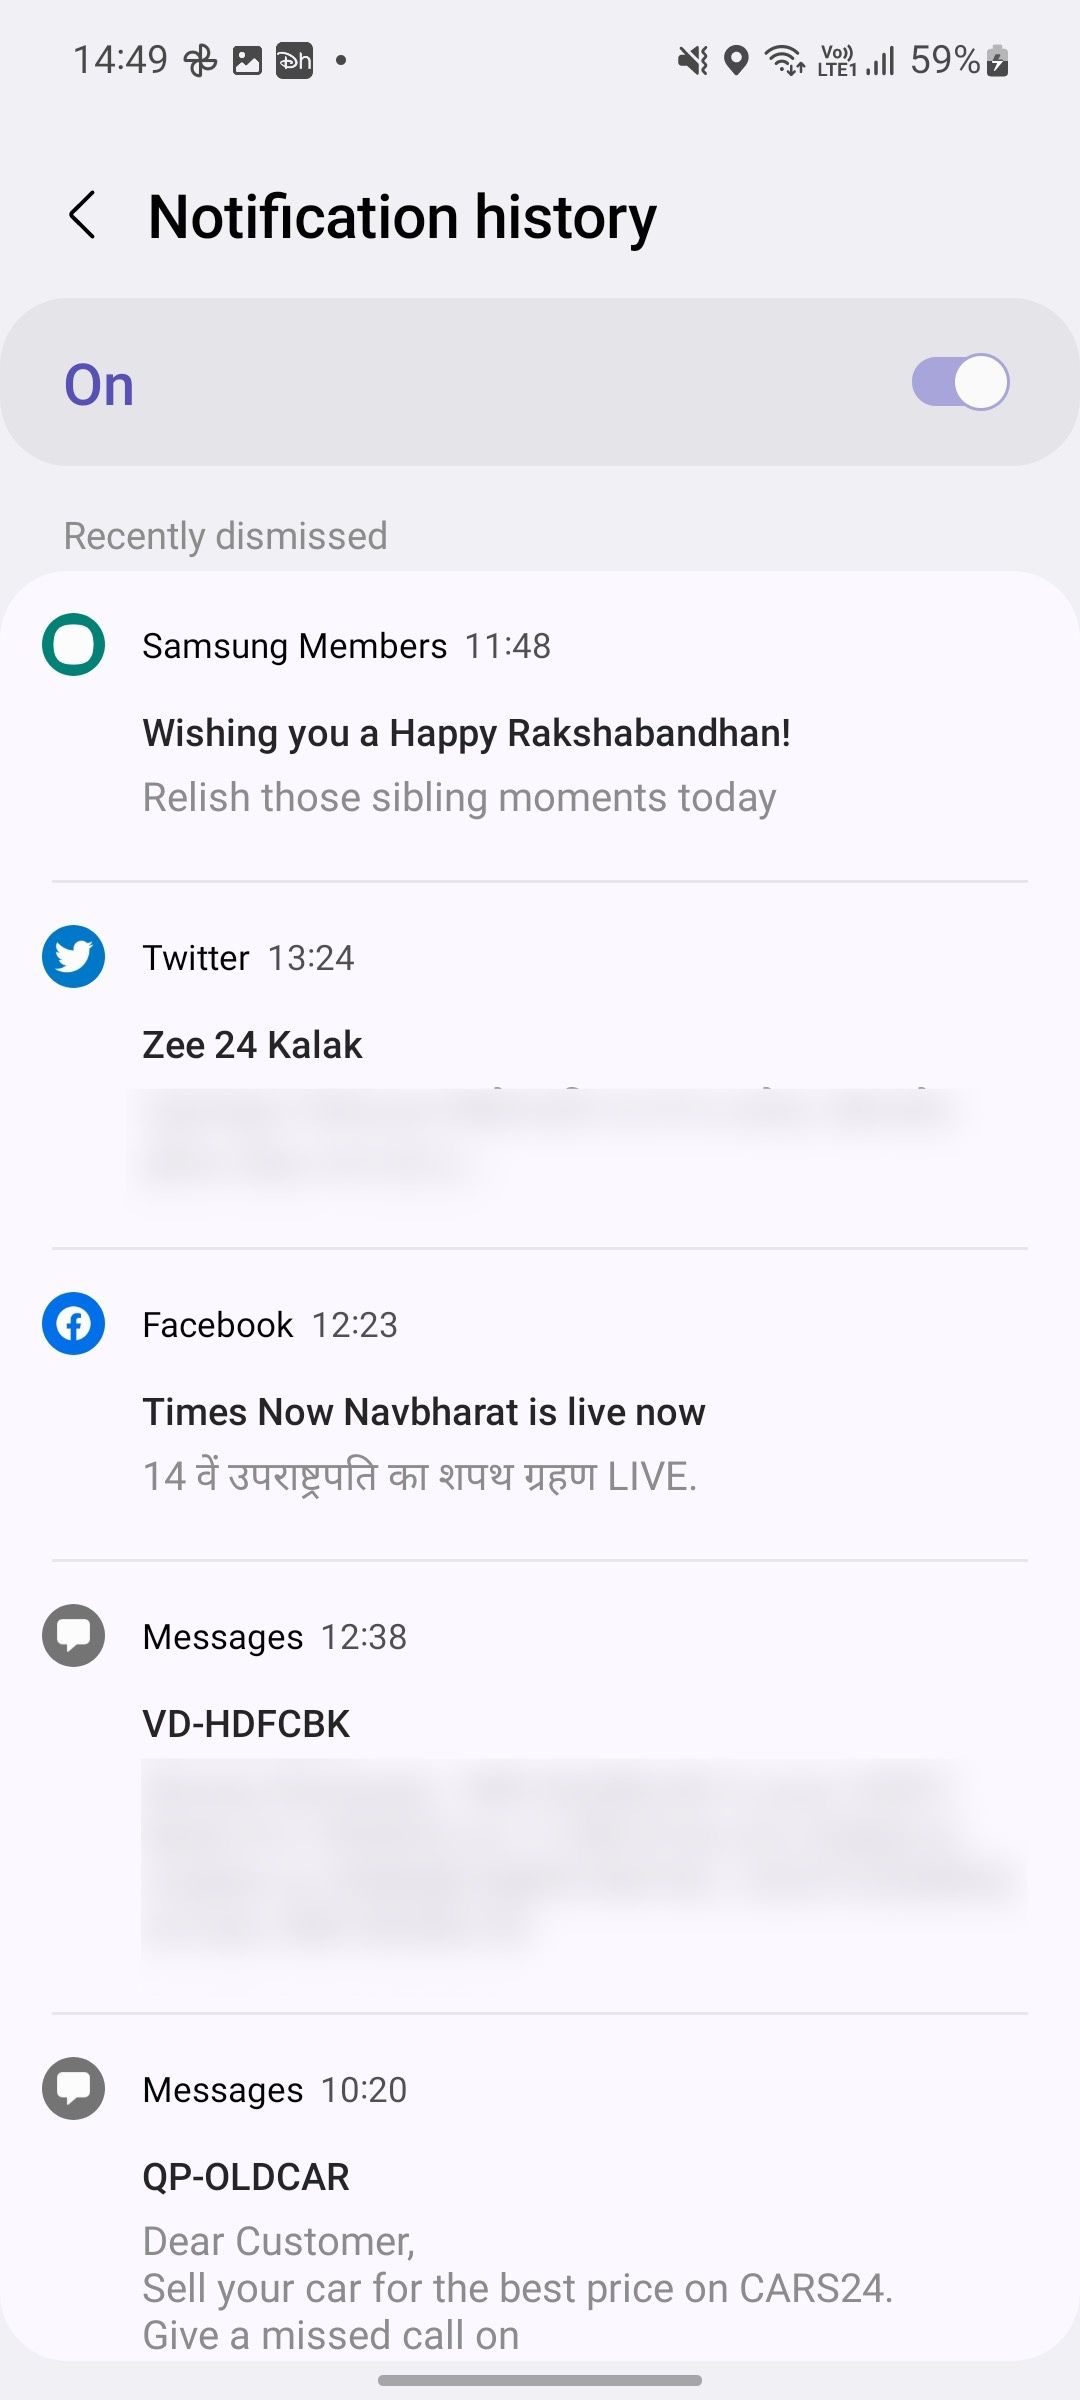
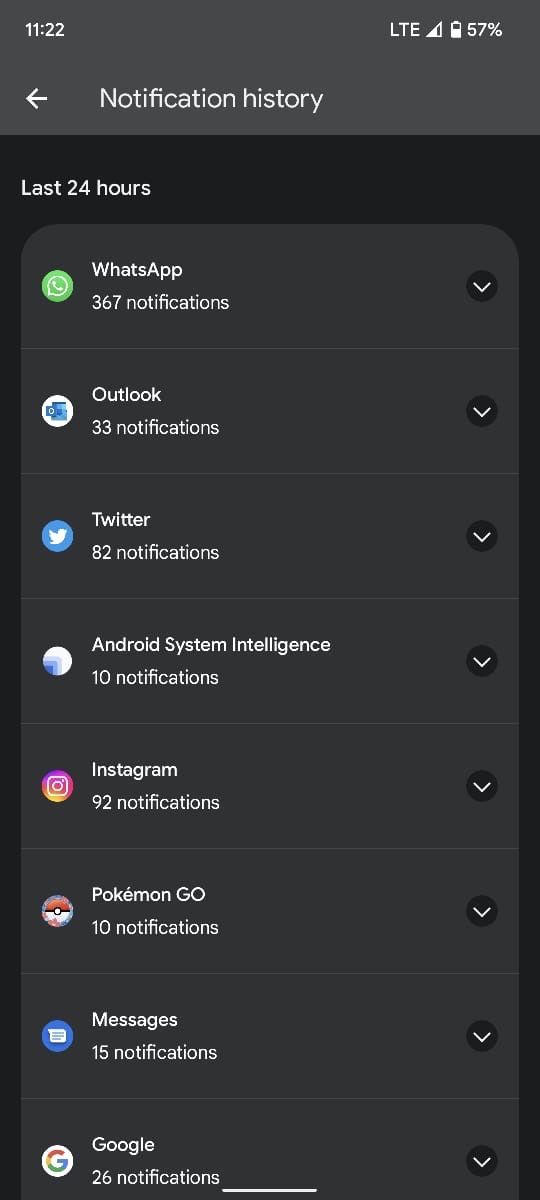
Notification history shows your alerts in chronological order, with the most recent at the top. However, the system doesn’t offer a way to place a notification history shortcut on the homescreen for easy access.
Deactivate your Android notification history
Be aware that notification history doesn’t come with biometric protection, so anyone with access to your phone can hop into Settings and check the last 24 hours of your notification history. Sometimes, you may not want the system to save confidential notifications from apps like Venmo or Telegram. You must deactivate the function entirely because there is no way to turn off notification history for individual apps.
- Open Settings and go to the Notification history menu (refer to the steps above).
- Turn off the Notification history toggle and confirm your decision.
Be aware that doing this deletes all of your notification history. You can re-activate it to keep your history again, but the system doesn’t restore your current notification history.
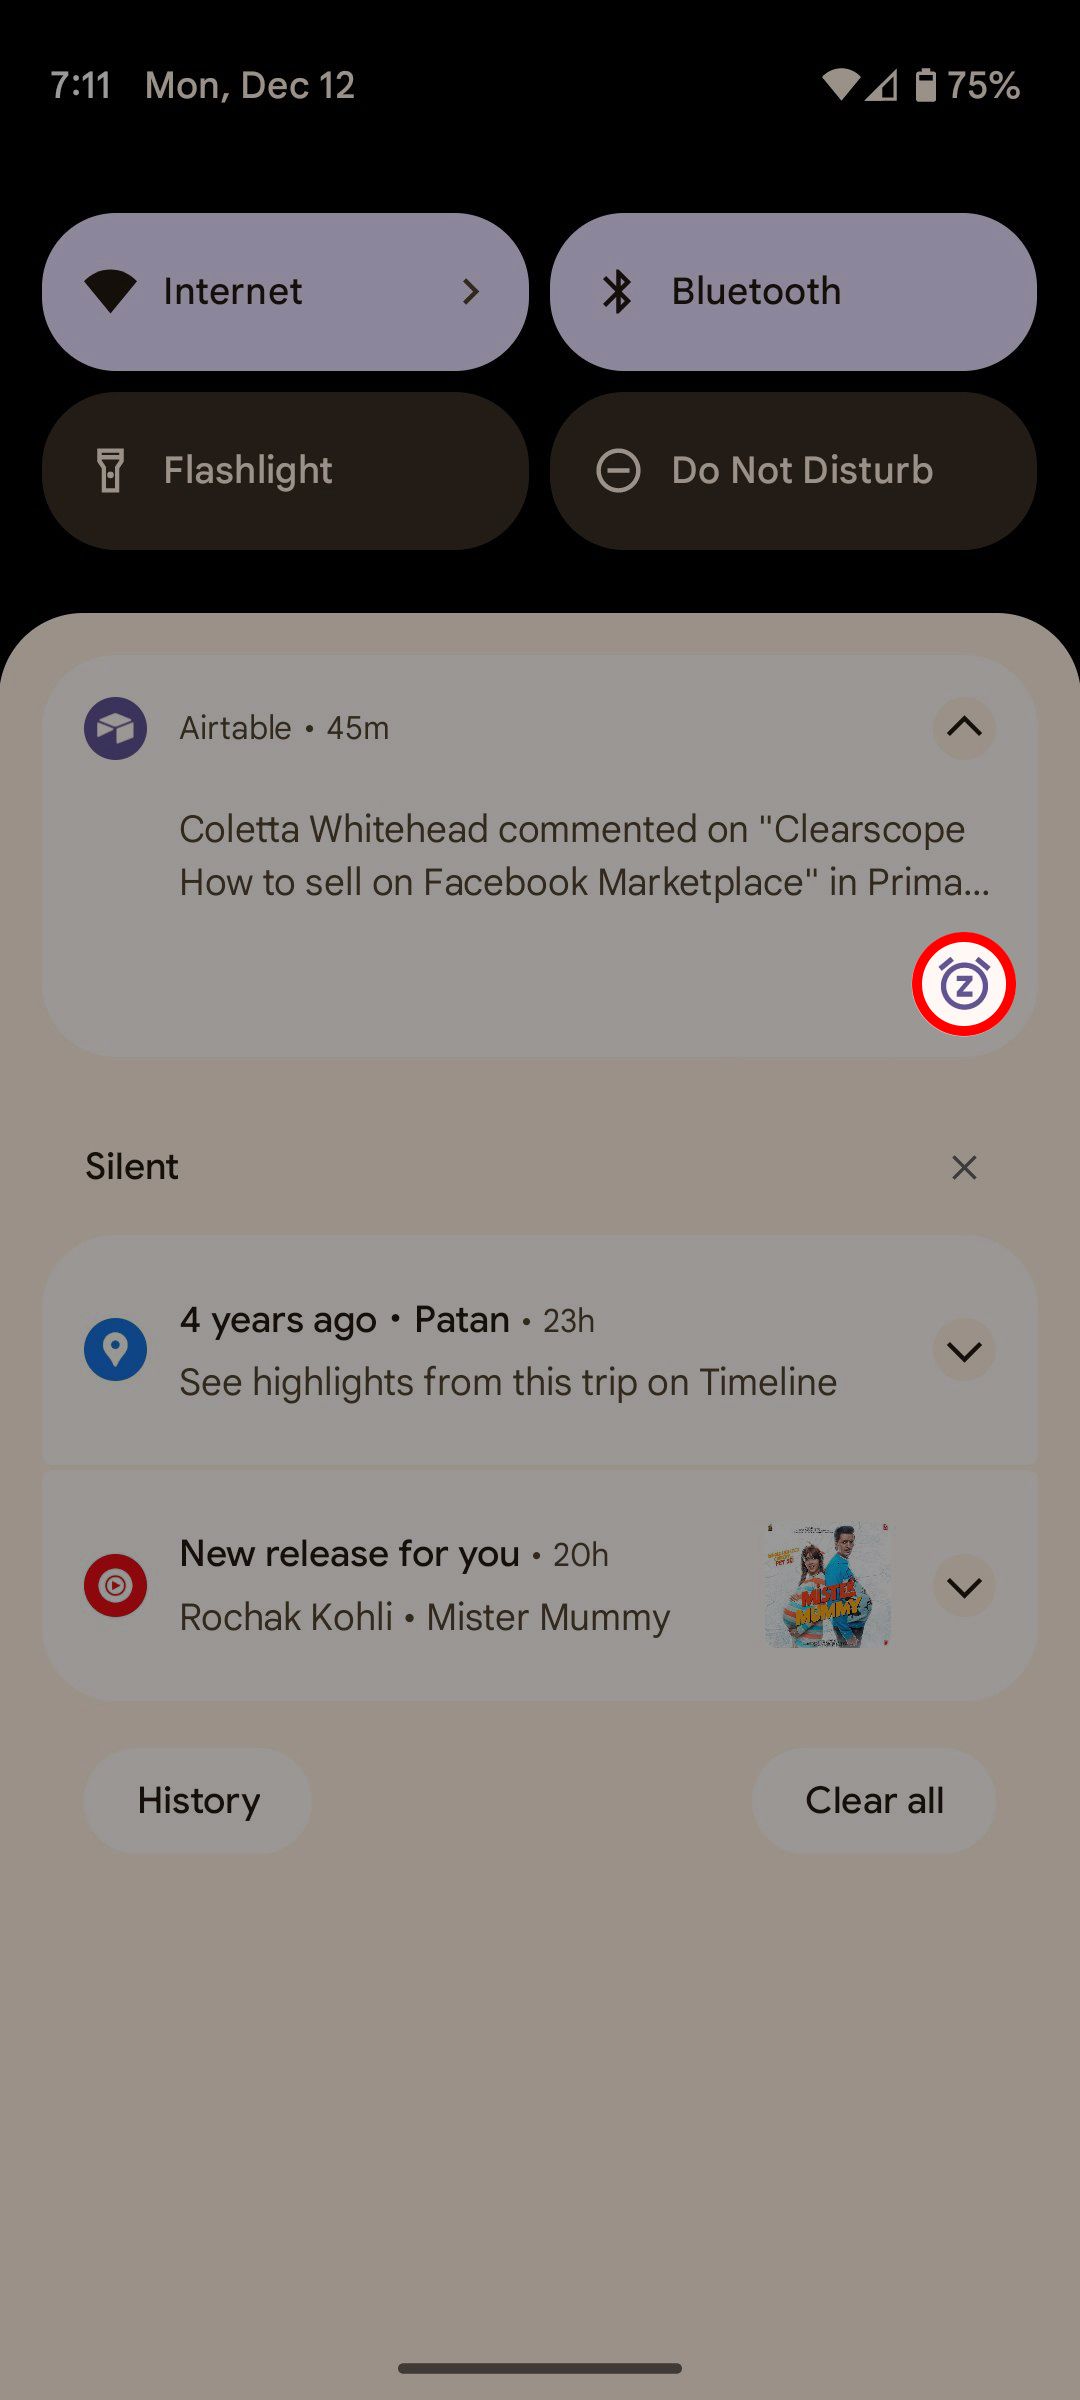
Snooze notifications on your Android phone
Instead of dismissing notifications left and right, you can snooze alerts and receive them at a more convenient time. After you activate notification snoozing from your Android phone’s settings menu, you’ll see a clock icon beside each notification. You can tap it to snooze notifications for up to two hours.
Never miss an important message on your phone
Most notifications are a hassle, but you don’t have to worry about missing an important one now. However, if notification overload is getting you down, check out these tips for managing notifications on your Android phone.

Khám phá thêm từ Phụ Kiện Đỉnh
Đăng ký để nhận các bài đăng mới nhất được gửi đến email của bạn.